Dominion Strategy Forum

Please login or register.

Login with username, password and session length

Show Posts

This section allows you to view all posts made by this member. Note that you can only see posts made in areas you currently have access to.

Topics - Titandrake

Filter to certain boards:

Pages: [1] 2 3 ... 6
1
Puzzles and Challenges / Puzzle from Galactic Puzzle Hunt
« on: August 10, 2021, 07:31:23 pm »
Figured I would share this in case people didn't see it a few weeks ago. (I know there's a decent overlap between puzzlehunting and Dominion, but it's not a full intersection.)

https://2020.galacticpuzzlehunt.com/puzzle/action-adventure

2
Dominion Articles / The Church/Church opening
« on: September 24, 2020, 05:04:07 pm »
This is an opening that's getting popular, which I like, but people haven't really talked about it yet.

The idea: Open Church/Church. Hope you draw a Church turn 3. Set aside a bunch of Coppers on turn 3, buying nothing, then buy a $5 cost on turn 4. If you draw a Church turn 3, you are almost 100% guaranteed to have 5 Coppers on turn 4, and will usually be able to trash an Estate as well.

It's good when: there is a $5 cost you'd really like in your deck by the end of the 2nd shuffle.

It's less good when: there is some other $3 or $4 cost you also really want early. Your expectation should be that you spend your 2nd shuffle trashing 1 Estate and buying a $5 cost. If there's an alternative card that will do more than 1 Estate trash while giving you good $5 cost odds, it'll be better.

The deceptively powerful parts: If you draw a Church turn 4, you can set aside any extra cards you don't need and they'll miss the shuffle, letting you draw and play your $5 cost faster.

Let's show a few scenarios to show how this thinner shuffle can be good.

If you draw one Church turn 3 and one Church turn 4, it's not too rare to trash an Estate, then set aside 2 cards on your turn 4 (Estate + Copper). That gives a 9 card shuffle (1 Church, the $5 cost, 1 Estate, 6 Copper, with 1 Estate trashed, and Church + Estate + Copper all set aside). If you then draw the $5 cost in your first hand of the 9 card shuffle, it'll get reshuffled at the end of that turn, you get small chances of high-rolling redrawing the $5 cost.

If you draw both Churches turn 3, you set aside your entire hand, then get 2 trashes and a $5 cost.

If you draw both Churches turn 4, you will likely miss $5. However, you can set aside your entire turn 4 hand, and your shuffle will be 6 cards (your turn 3 hand + turn 3 buy, with 2 Churches and your entire turn 4 hand set aside). You then will almost 100% hit $5 on turn 5, and that $5 cost will get shuffled in right away thanks to how thin your deck is.

In short: the open is best if you draw a Church turn 3, which is pretty common given you opened 2 Churches. If you don't do that, but draw a Church turn 4, it isn't that bad of a fail case. And if you don't draw any Churches on turn 3 or turn 4, then you sombrero-ed, which is very uncommon, and can't be played around anyways.

3
Dominion Articles / Mandarin-Scepter Loops
« on: August 21, 2020, 05:37:34 am »
To forestall any questions: no, this will never come up in a real game of Dominion. It's fun to think about though.

Mandarin is a bad card. Scepter is an okay card, but is limited due to its only letting you replay Actions during your Buy phase. By their powers combined, you can do some funny pileouts.

The core pieces you need in the kingdom are:
  • Mandarin
  • Scepter
  • An Action that will gain a $5 cost Action on-play, while staying in play. Without cost reduction, this basically means Artisan or Altar, although Altar requires having things to trash.
  • An Action that draws cards.

The idea is that you play your turn as normally, getting a +Cards and the gainer into play. After drawing N Scepters, you play N-2 of them as Actions, play the N-1th one as the gainer to gain Mandarin (topdecking all your Scepters), then play the Nth one as +Cards to redraw your Scepters. This brings you to the same start state, with 1 fewer Mandarin and 1 Scepter in play. You can repeat this loop until the Mandarin pile runs out, and hopefully your action plays are giving you net +$ or net +buy. At minimum you are piling down the Mandarin pile.

An example with Inventor and Smithy, assuming you start your buy phase with 3 Scepters in hand.

1. Play Inventor and Smithy (now $5 costs are gainable from Inventor)
2. Play Scepter as anything
3. Play Scepter as Inventor, gain Mandarin, topdeck 2 Scepter
4. Play Scepter as Smithy, draw 2 Scepter + Y
5. Play Scepter as Inventor, gain Mandarin, topdeck 2 Scepter
6. Play Scepter as Smithy, draw 2 Scepter + Z
7. Repeat steps 5-6 forever.

In this example, you draw 1 card deeper and get one more cost reduction from Inventor each turn, but you aren't netting Scepter plays. However, once you draw into a 4th Scepter, you get to loop as

(start: 1 Scepter in hand, 3 on top of deck)
1. Scepter as Smithy
2. Scepter as X
3. Scepter gaining Mandarin, topdeck 3 Scepter, back to loop start.

That lets you get in other action plays, until you run out of Mandarins to gain. If you spend X on an action that gains Scepter, you can do increasingly more each loop, assuming you draw into the extra Scepters. Here is an Artisan example, where it's easy thanks to topdecking.

(start: Artisan and Smithy in play, 1 Scepter in play, N Scepters in hand)
1. Scepter as Artisan, gaining and topdecking Scepter.
2. Repeat step 1 until you have 1 Scepter in hand.
3. Scepter as Smithy, draw your topdecked Scepters
4. Go back to 1) and repeat until N = 2
5. When N=2,
   5.1 Scepter as Artisan, gain Mandarin, topdeck all Scepters
   5.2 Scepter as Smithy, draw Scepeters.
   5.3 Repeat Smithy until you redraw all topdecked Scepters, then go to step 1 with a larger N than last time.

4
Dominion Articles / Menagerie Hot Takes
« on: August 04, 2020, 05:00:36 pm »
(Is it even a hot take if it's been over 4 months since the expansion came out? Who knows.)

In general, "Gain X Horses" can be treated as "+X cards" for power level. It's different in several ways. You only get the draw 1 shuffle after you play the card, you can save Horses, but you don't always draw all your Horses. But very generally, it's basically +X cards.

Black Cat has an insane reaction that is held back by the terminal +2 Cards. You can definitely skip it, but if your deck can support Black Cat, it puts a lot of pressure on end-game VP.

Sleigh is similarly weak, where 2 Horses is just not great for a $2 cost (remember, it's roughly +2 Cards). The reaction can be nice but I haven't been impressed with buying Sleigh for just its reaction. If you're in the market for both the top and bottom of Sleigh, then you could try it.

Supplies is quite good. Some people say you should usually buy it over Silver. I'm not too far off from that. Topdecking a Horse is pretty nice and if you can draw deck then it's basically a $2 cost Peddler, except you get to frontload the draw to the start of your turn, which is good for reliability.

I have yet to get Camel Train to work for me. You're supposed to view it as a Duplicate, but one big benefit of Duplicate is that it sticks on your Tavern mat outside of your deck until you want to call it, and you can Duplicate Duchies. Camel Train just sits in your deck forever. I might be missing something but I find that it feels bad to play it before I have deck control, and by the time I have deck control I want to be spending my actions on other things.

Goatherd's fine. Sometimes skippable if there's no other trashing, +1 Action trash a card for no benefit isn't always good enough. But otherwise it's worth buying. Just remember the Goatherd draw isn't going to last forever.

Scrap's great, of the early Estate trashers it's one of my favorites. Unless you really need the +1 card now I think you should take the Horse over the card. I generally like turning my first Estate into Silver + Horse early, then the future Estates into card + action or horse + action. If you really need to, you can Scrap Silver --> Silver + action + buy to get a janky non-terminal +buy into your deck.

Sheepdog is another card that lives off its reaction, except you can actually trigger the reaction yourself. Can be inconsistent but the deck is powerful if when it triggers.

Snowy Village's +4 Actions effect is strong enough that I feel you normally buy one, even if you have other villages. If you have lots of cantrips, you think twice about it. Don't get more than 1, unless it's the only +Actions source, in which case you maybe get 2, but even then you want to get away with just 1.

Stockpile is insane, especially in 2 player. I'm still not sure how to play it, all I know is that if you play against someone who skips it you tend to win. My suspicion is that early on, you want to get all your Stockpiles off the mat before your reshuffle, but after you get a few, you only want some in the reshuffle.

Bounty Hunter is a nice thinner. (Or exiler? IDK what the terminology is). Makes it very easy to hit $5 and even $6 the first few times you play it. Usually buy 1, buying 2 can be reasonable, 3rd and up is a waste.

Cardinal is either great or awful and I feel it tends towards the "awful" side more often than not. It's not too rare to have a game where, say, your Village gets Exiled, but you just get it back immediately because you're looking to buy more Villages anyways. But when the attack is good, it's really annoying.

Cavalry's top portion is kinda eh. Its bottom portion is insane. Quite nice with trash-for-benefit.

Groom is great with Alt-VP rushes, and even outside Alt-VP rushes, Horse gains on your actions is good, and double Silver gains for money decks isn't bad either. In engine games it's already worth opening Workshop to gain $4 cost actions, Groom is the same thing except you get Horses along the way.

Hostelry would be fine even without the bottom text, the bottom text makes it interesting. It's basically "overpay for Horses". I will still take key $5s over Hostelry + Horses early, but later on I'm happy with overpaying for some Horses.

Village Green doesn't really need its reaction to be good, but if you have discard synergies, then yeah, go for it.

Barge should usually be played for your current turn, but if it's your last action and you have a decent buy in your current hand, playing for next turn is nice. And turns out a +3 cards +1 buy card is always welcome at $5.

Coven is weird. You can definitely outrace it, but if you get it wrong then you just lose. If you're trying to outrace Coven, skip Coven entirely, you don't want to help them get the Curses into your deck. If you're going for Coven, you want 2-3 as well as whatever other cycling you can get your hands on.

Displace is the standard Remodel tricks, except you also get to do Province --> Gold, Gold --> Province loops. Those loops are quite nice, because even if you don't fully loop the gains, turning a Province-in-deck into a Gold-in-deck (or another Displace) is already a good effect. You usually buy this card, there's something worth doing with it.

Falconer is conditionally good, you need good $2/$3/$4 costs to want it. Unlike Black Cat / Sheepdog, its base effect is good enough that you don't need to exploit the reaction a bunch to get your money's worth. But of course, if you can use the reaction, then you do so.

I've been disappointed by Gatekeeper, it just feels too slow to pick up a lot of the time. It's not Swamp Hag.

Hunting Lodge is the nuts. Like, dang, this card is great. You don't have to go full draw-to-X either, you just have to lean into the draw-to-X a little bit and otherwise just use the reaction when you draw it with a bad hand.

Kiln compares less favorably to Haggler IMO, but Haggler is a great card so that isn't saying much. I find that what happens is that you want to Kiln an Action card, but to do so, you need to go Village-Kiln-Village, or Village-Village-Kiln-DrawCard. It takes a while to get your deck to the point where you can Kiln Action cards, since your starting hand needs to have lots of +Actions in it. So you normally just Kiln Treasure cards...which is fine, free Gold gains are nice! But it's not quite what I hoped for out of the card. This is payload that you use after your deck is built to get more money into your deck, not a deck building accelerant to improve your draw.

By now everyone's praised Livery a bunch. When there's +Buy, Livery can really just turn into a Horse printer. Even without the crazy turns, you only need to gain 2 qualifying cards for Livery to become approximately +2 Cards +$3, which is a great deal for a $5 cost.

Mastermind takes a while to set up, but its effect is so good that you should get it early, it'll be worth it. Generally how Mastermind games play out is that you avoid putting Masterminds under Mastermind, until your last few turns, at which point you try to set up Mastermind-Mastermind-X-Y-Z chains and end the game.

Paddock is interesting. The base effect is close to the mythical +2 Cards +$2 for $5, a card that's very good in a money deck. In an engine deck, you still want Paddock, but you want to get an empty Supply pile fairly early to make it non-terminal. Once it's non-terminal, Paddock is insane.

The biggest difference between Sanctuary and its compatriots Junk Dealer / Upgrade, is that you can maintain a clean deck while greening by Exiling Provinces. Oh and the +Buy. Non-terminal +buy is always a win. I think Sanctuary is right around the same power level as Junk Dealer / Upgrade, they're all great cards and it's hard to go wrong with buying them as your first $5.

Fisherman is unexciting at $5 and you don't always have a good opportunity to buy it at $2, but you'll pick it up in both cases.

Destrier is better than Lab, which is a bit weird since Lab is already a really good card. If you can get +buy and draw then you get into situations where you're buying Destrier for $4 or $3, which is just absurd. You want to make deliberate moves towards getting cheap Destriers, because they snowball very rapidly - more Destriers = easier time drawing your gains or +buys = even more cheap Destrier.

Similarly, Wayfarer is insane - it's arguably the strongest in the set. (Or at least, if you argue it is, you won't be laughed out of the room.) It's just very easy to have some way of making the card cost less than $6, and if there isn't one, then you can pay $6 for your first Wayfarer and use the Silver gain to make your next ones cheaper. In Wayfarer games, focus more on draw. It's very easy to fill your payload space with free Silver gains off Wayfarer, so your aim is to make your payload space big (by getting lots of Wayfarers, wow this card does everything you want, wtf.)

And then there's Animal Fair, which is....eh, it's okay. Sure, it's a funny open with Necropolis. Otherwise, it's just kind of there. I'm not looking to go out of my way to get an Animal Fair, but I will pick one up if the opportunity shows up.

5
Dominion Articles / Sometimes you don't need to trash right away
« on: June 22, 2020, 03:51:41 pm »
Trashing is good, thinning is winning, so on and so forth. But why is thinning winning?

Well, thinning is winning because it lets you get rid of bad cards, and it makes you more likely to collide Action cards together to draw your deck. Usually, that makes up the tempo loss you get from trashing cards early. Thinning, by itself, is not intrinsically valuable - it is a means towards the end of drawing your deck, gaining lots of cards, and producing lots of money.

Let's suppose we waved a magic wand, and could guarantee that we draw our deck every turn. Then what is trashing doing for us? Pretty much nothing. In fact, it's actually bad, because you don't get the money from the Coppers you trashed. Of course, most games are not like this - you need the trashing to get to the "draw your deck" phase in the first place, or you get to "draw your deck" faster by trashing.

But, there are the rare games (think Wharf engines) where the draw is so potent that you can start drawing your deck without trashing very heavily in the early game. In those cases, it can be better to trash less aggressively early. That way, you have the money to buy the draw cards like Wharf. Once you have the draw set up, you can catch up on trashing later - if you draw your deck then you can play your trasher every turn and your deck should clean up pretty quickly from there.

Trashing almost always comes with a short-term tempo loss (except for Masquerade, because Masquerade's busted). It's just that usually the tempo loss is small enough that it makes up for itself super fast and you don't care. Sometimes, you do.

6
Dominion Articles / Clean Shuffles
« on: October 19, 2019, 10:34:06 pm »
Renaissance introduced 2 cards that are useful in the opening: Lackeys, and Silk Merchant. They both draw 2 cards, while coming with some Villagers.

These are useful opening cards because they heavily increase your odds of a clean shuffle: ending your turn with 0 cards left in your draw deck. Assuming you gain 2 cards on turns 1 + 2, and the other card you gain doesn't draw cards, then you are guaranteed to see all 12 cards in your deck by the end of turn 4 as long as either Lackeys or Silk Merchant is drawn on turns 3 or 4, and the Villagers guarantees you can play the other card you bought if it's terminal.

I mean, you still have the Lackeys or Silk Merchant left over, and the Villagers won't last forever, so you have to be a bit careful, but it's part of what plays into their power level.

You don't have to go all the way to a clean shuffle either. Think of it this way: what sucks the most is when cards you open miss the reshuffle. This happens if they're near the bottom of your deck and you don't draw down far enough. Let's say there's one card you really want to draw before the reshuffle (say a trasher like Steward, or a gainer like Ironworks). Assuming it's terminal, there's a 1/6 chance the card misses the reshuffle (2 out of 12 cards).

Let's say you open Cantrip/Steward. Now, if you draw that cantrip on turn 3 or 4, you draw down 11 cards instead of 10. The math is a bit nontrivial, but it works out to about a 1/11 chance of missing the Steward. breppert has the exact number in their Opening Probabilities article, if you are curious.

Everyone knows that Ironmonger is a great opening card. I mean, this is obvious if you open it a few times and notice that your deck just feels cleaner. But now I'm thinking the reason it's good is because you usually reveal and discard a Copper, and that effectively lets you see all 12 cards unless the Ironmonger is bottom decked.

I don't know if this is something you should be thinking about past the opening, but it's neat.

7
Dominion Articles / Core Concepts of Dominion Endgames
« on: August 27, 2019, 03:31:39 am »
(I found this draft in my old files. It's probably over a year old. I don't think I'll have time to polish it for a while, so I'll share it in its unfinished state.)

In my opinion, the most important thing you can do to level up your gameplay is improve your endgame. Dominion endgames are very difficult to play perfectly, but they give concrete edges, because tight endgame play lets you absorb bad luck and misplays without losing.


What is the Endgame?
--------------------------------------------

This is a deceptively tricky question to answer. I define it like this: the endgame starts when players start worrying about how much VP they have or can achieve. I don't define it by when players starting buying Victory cards, because plenty of endgames revolve around the threat of buying VP cards, rather than actually buying them.

Another way to put it is that the endgame is the point where players are thinking about win conditions. Is the board going to 3-pile soon? Am I positioned well? Do I have a lead of VP that I can hold until the end of the game, or can I catch-up to a VP deficit in time?


Level 0: Can I Win This Turn?
---------------------------------------------


On every turn, you should be considering whether you can win this turn. If you have a guaranteed win and you don't go for it, you're leaving free wins on the table.

Of course, this is all very obvious, but I've seen countless players miss clear wins, particularly 3-piles. It's easy to tell when you can empty the Provinces, but 3-piles can be more complex.

Roughly, in the endgame, each player has a certain amount of potential. When ending the game, you are usually bottlenecked by these constraints.

  • The money you can produce
  • The number of gains and buys you have, and what kind they are (Workshop gains are only up to $4 costs, for example).
  • How many points you need to end with a lead.

Your potential is defined along these 3 axes: money, gains, and VP. Different 3-pile endings hit these constraints in different way. For example. with $24 and 3 buys, I can buy 3 Provinces for 18 VP. If I have $16, I can't buy 3 Provinces, but if I have 8 buys/gains and two piles are empty, I can empty Estates for 8 VP. If, somehow, 2 piles are empty, I have $0, I have 10 buys, and have a VP lead of 11 points, then I could even buy 10 Curses to get the 3-pile ending.

The most complicated 3-piles involve overdraw, trash-for-benefit, cards that gain cards to the top of your deck, and so on. Many 3-piles are not this complicated. I generally follow this flowchart:

"Can I gain enough cards this turn to potentially trigger a 3-pile?"
"If I can, do I have enough money and the right types of gains to do so?"
"If I do so, how much do I have left-over to pick up VP, and is that enough?"

If the answer to all these questions is yes, then you have a 3-pile. Otherwise, you don't, which takes you to the next part.


Level 1,2,3,4,...: How Do I Make Sure my Opponent's Can't Win?
-------------------------------------------------------


Now we're getting to the fun stuff. If the most important part of Dominion is ending the game on a win when you can, then the 2nd most important part is making sure your opponent can't do this.

This is much harder because it requires tracking what your opponent's deck can do. Luckily, your opponent does you the favor of playing their turn right before yours. It's usually good enough to get a feel for how strong your opponent's deck is based on what it's previously done, and you can leave the card counting for high-stakes scenarios.

Like every other game, if you can't end the game, you want to make moves that make sure your opponent can't end the game. This is Level 1 - planning 1 turn ahead. Ask the same 3 questions, as if you were your opponent, and see what board states give them the guaranteed win. Then, figure out if that limits anything about what cards are safe to buy this turn.

More subtly, if your opponent is good (and you should always assume your opponent is good), then they're trying to do the same thing as you. So at the same time, you'd like to make moves that give you more endgame potential. The more pileout power your deck has, the more limited your opponent's moves become, since when they do their Level 1 planning, they'll have fewer safe buys because you win in more board states. This is Level 2 - planning 2 turns ahead by making a play that makes it harder for your opponent to play 1 turn ahead.

The levels keep going up from there, but it generally turns into intuition / "game sense" when you try going much further up the hierarchy. Dominion's a game of chance and it's just too hard to reason about the odds several turns in advance.

Once you know what parameters you can play with (what cards are and aren't safe buys), you have a few options.
  • Pick up a bunch of VP this turn. This protects you from losing because it forces your opponent to dedicate more resources to picking up points, which can give protection against pileouts. It can stop you from winning because your deck will generally become less consistent.
  • Pick up a cards that increase what your deck can do. This makes life harder for your opponent, because it opens up more potential pileouts, but it doesn't give you any points and it generally brings the game closer to an end.
  • Do a bit of both: buy some Actions and Treasures and then pick up some VP as well.

In correct play, you want to be spending all your gains on Actions, then flip a switch and spend all your gains on VP until the end of the game. Because of this, the 3rd choice of "do a bit of both" is something you want to do at most once, if you're on a in-between turn between deck improvement and cashing in your deck for points. If you end up doing this multiple times, you're probably playing loose, or the game's just weird.

When unsure whether you should build or buy points, building is usually better because it keeps your deck more consistent. If possible, you really want to keep your deck consistent in the endgame, because the endgame is about threatening what your deck can do. If your deck isn't consistent, then your opponent can respect your pileouts less, and that frees up their options.

8
Dominion General Discussion / The dead can rise again
« on: July 03, 2019, 03:25:45 am »
You know what they say: no one's ever really gone. From the ashes of ill-advised VC funding and abandoned domain names comes a new company, taking up a mantle that's been dormant for years.

https://www.goko.com/

9
Dominion Articles / Fool
« on: April 01, 2019, 03:07:43 pm »

Fool is my greatest creation, and my worst mistake.

Fool is one of the strongest $3 costs in recent memory, and has a tendency to take over games, especially if multiple players decide to pick it up.

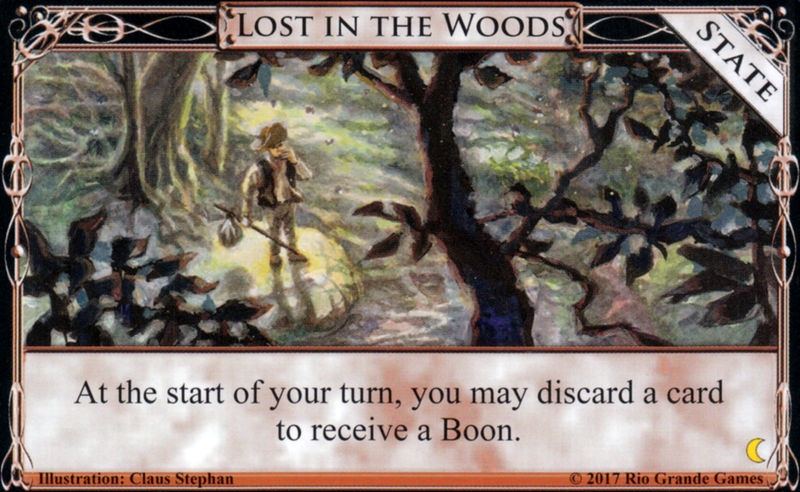
Most of its power comes from the passive effect of the Lost in the Woods state. Getting to discard a card for a Boon every turn is powerful enough to deserve contesting it heavily - the 3 Boons you get when playing Fool the first time are simply a rounding error.

Due to the power of Lost in the Woods, it's important to pick up as many Fools as possible. Not only does this protect you from other players taking the Lost in the Woods effect, it also gives you plenty of fodder to feed to Lost in the Woods. A Fool's a Fool, but you could discard that Fool to to Lost in the Woods and get The Sea's Gift to get +1 Card. You could draw anything! It could even be another Fool. This was strong enough that Donald X ended up pairing Fool with Lucky Coin to slow down the game.

In the end though I decided maybe I could pair it with Lucky Coin and the Silvers you gained would slow down how often you played Fool enough to avoid problems.

As everyone knows, Silvers are the same as Curses. It's only thanks to this Lucky Coin balancing that Fool doesn't take over games quite as strongly as Ambassador or Masquerade do. Strategy-wise, there isn't much more to say, besides

1) You should open Fool (Fool/Silver is a common choice).
2) You should try to pick up a 2nd Fool before your 2nd shuffle.
3) It's important to check the date of all strategy articles, as many old articles are no longer relevant in the current age.

10
Dominion Articles / When Should I Start Greening?
« on: March 30, 2019, 04:29:12 am »
If you're not familiar with Dominion slang, "greening" is when you start buying VP cards for points.

You should start greening based on how quickly you can improve your deck and your buying power. The faster you can improve it, the longer you should delay buying VP. The reasoning's simple: buying VP cards slows down your deck. Part of the problem is adding a junk card. The bigger problem is that $8 spent on a Province is $8 less that could have gone to more money or Action cards. If the Kingdom supports faster growth, you're better off investing into your deck now and buying points later.

If you're playing a Gardens rush, then, well, for one Gardens rushes are not as strong as we thought they were 5 years ago and a lot of Big Money baselines compete with it. But something they're right, and in these cases you start greening right away. It's not like your deck is going to do much better than hitting $4 for Gardens.

If you're going for Duchy-Duke, then you want to start greening a bit later, late enough that you can somewhat reliably hit $5. But still much earlier than you would in a Province game.

If you're playing a 1 buy a turn deck, you don't have any reason to hit more than $8 for Province (or more than $11 for Colony), so you start greening when you think your deck can usually hit $8.

If you're playing a reasonable engine, one that draws a lot of cards but not always your entire deck, you start greening around the point where you're hitting $13 (Prov + Duchy), $16 (2 Provinces), or $18 (Province + 2 Duchies, a useful option to have in endgames). Two Provinces a turn is a sweet spot where the game ends very soon if both players decide to start greening - 8 Provinces goes away in 4 turns, or 2 turns each.

However, if you're playing a Kingdom with a strong engine, something like Wharf + Village + trashing, you may want to build even more. $24 for triple Province, $28 for 2 Province + 2 Duchy, maybe even $32 for 4 Provinces. On these boards, it's common for high-level play to turn into a game of chicken that eventually ends in a low-scoring 3 pile. When both players believe detouring for points will cost them the game, they both buy actions instead, bringing the game closer to a 3 pile.

And then there are Bridge boards and Bridge Troll boards, where you play for the megaturn and buy all your points on the final turn, because these cards grow quadratically and there's really no reason to pick up points unless you have to in order to avoid a 3 pile.


Here are some toy examples. In these examples, when I say a deck hits $N, I mean it always hits $N, even as Victory cards are entering their deck.

Both decks can hit $8, takes 2 turns to build deck into one that hits $16

Let's say first player goes for Provinces, and 2nd player tries to build

P1: Province
P2: build
P1: Province
P2: build
P1: Province
P2: Province + Province
P1: Province
P2: Province + Province, both players have 4 Provinces, tie at game end.

So it isn't any worse at hitting 4 Provinces. But in a real-life version of this scenario,
1) P2's deck is more reliable because they buy Provinces later, and
2) if P1 misses $8 once, P2 can punish that bad luck more severely.
If P2 gets unlucky, then well, they lose. But if they didn't build and got unlucky, they would have lost anyways, and P2 is less likely to get unlucky if they build their deck a bit more.

If we reverse the roles, and have P1 build, then P1 wins.

P1: build
P2: Province
P1: build
P2: Province
P1: Province + Province
P2: Province
P1: Province + Duchy (P1 has 3 Prov 1 Duchy, P2 has 3 Prov)
P2: "If I buy Province, P1 wins on Province. If I buy Duchy, P1 wins on 2 Provinces." P2 loses.

Both decks can hit $16, takes 1 turn to build deck to one that hits $24

Say P1 goes for double Provinces and P2 goes for building.

P1: Province + Province
P2: build
P1: Province + Province
P2: "If I buy 2 Provinces, P1 wins on Province + Province". Buys Province + 3 Duchies (costs $23)
P1: Province + Province (P1 has 6 Provinces, P2 has Province + 3 Duchies)
P2: loses

In this example, P2 loses because they don't have time against a double Province player.

If we reverse the roles, P2 still loses.

P1: build
P2: Province + Province
P1: Province + Province + Province (P1: 3 Province, P2: 2 Province)
P2: "If I double Province, P1 wins on Province + Duchy. If I don't buy any Provinces, P1 wins anyways on triple Province." P2 loses. (In a real game I would buy Province + Duchy and hope P1 has a dud and hits less than $16.)

In fact, P1 wins even if both players go for double Provinces.

P1: Province + Province
P2: Province + Province
P1: Province + Duchy (P1: 3 Prov + 1 Duchy, P2: 2 Province)
P2: "If I double Province, P1 wins on a single Province. If I Province + Duchy, P1 wins on double Province". P2 loses.

In this setting, P1 wins because they have first mover advantage. But what if we can build to $24 while picking up some points along the way?

Both decks can hit $16, takes 1 turn to build deck to one that hits $24, on the building turn you can afford buying 1 Province

P1 goes for double Prov, P2 builds

P1: Province + Province
P2: builds + Province
P1: "If I double Province, then P2 ties on triple Province. Can I win if I don't allow the tie?".
    (P1 hypothetical)
    P1: Province + Duchy (P1: 3 Provinces + 1 Duchy, P2: 1 Province)
    P2: "If I buy 2 Provinces, P1 can end the game." Province + 3 Duchies (P1: 3 Provinces + Duchy, P2: 2 Provinces + 3 Duchies)
    P1 "Only 3 Provinces are left, so P2 can end the game no matter what I do. I should get as many points as possible." Province + Province
    P2: Province + 3 Duchies (P1: 5 Provinces + Duchy. P2: 3 Provinces + 6 Duchies. P2 wins)
P1: "Okay, I can't, I take the tie". Province + Province
P2: Province + Province + Province

If we give the option of picking up a Province while building towards $24, then P2 can turn a losing situation into one where they can get a tie instead, as long as P1 goes for the double Province strategy. But, if P1 builds, then P2 will once again lose no matter what they do.

P1 builds, P2 does double Province

P1: builds + Province
P2: Province + Province
P1: Province + Province + Duchy
P2: "P1 can end the game no matter what I do and I can at most get 4 Provinces, while they have 3 Provinces + 1 Duchy". P2 loses.

P1 builds, P2 builds

P1: builds + Province
P2: builds + Province
P1: Province + Province + Duchy (P1: 3 Provinces, 1 Duchy. P2: 1 Province)
P2: "A 6-2 Province split is not beatable. If I buy a single Province, P1 can end the game on Provinces. Therefore I should deny all the Provinces I can." Province + Province + Province
P1: Province + 3 Duchies (P1: 4 Provinces, 4 Duchies. P2: 4 Provinces)


These toy examples are far enough from reality that I would not follow them religiously. In particularly, they're missing a model of how your deck becomes less reliable as you add VP cards to it. But, they do show how the decision of when to build and when to green isn't just "stop at $8" or "stop at $16". It's dependent on the context of how quickly your deck can become better, how many VP cards are left in the pile, and how well your deck can handle Victory cards.

Even though these examples aren't perfect, they do show off the emergent complexity of Dominion endgames. It's quite tricky to play them correctly, and there aren't really any shortcuts besides thinking about the possibilities and seeing what happens in each one. But that's a subject for another article.

11
Dominion Articles / Guildhall Money
« on: December 22, 2018, 07:10:10 pm »
Think of this mostly as a draft + hot take, since Coffers strategy is quite difficult. I think Guildhall is pretty good but also suspect I'm slightly overestimating it.


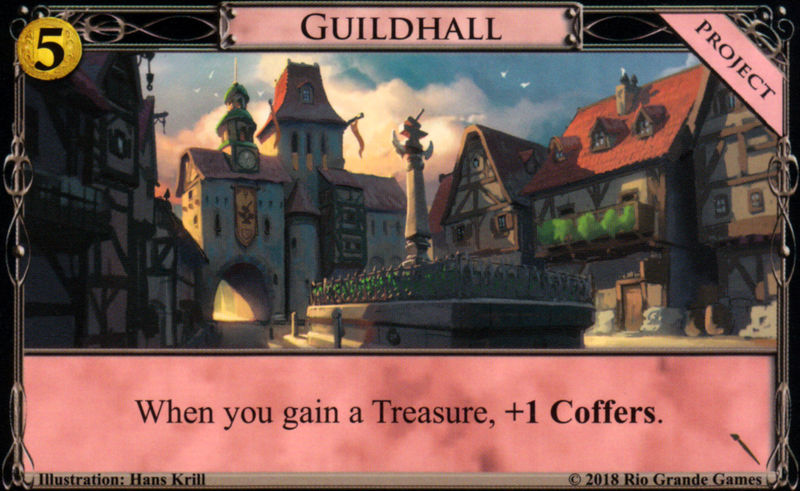
Guildhall is the Project that helps bring treasure-based strategies back. In an era where people are describing Silvers and Golds like Curses, it's refreshing to see something pull in the other direction.

Now, I'm not saying Guildhall is bad in a less money-based strategy. But the main problem is has for engine-style decks is that in those decks, you often need to be very careful in how many Treasures you gain, since you're trying to maintain control of your draw and your deck. The guiding principles of engines is that they aim to play cards they buy as often as possible. Since Guildhall only triggers on-gain, it doesn't get to take advantage of the compounding effects engines normally give you. This means the main use of Guildhall giving better weapons to "the fun police" - strategies that generally buy Silver and Gold instead of lots of fancy actions.

Base Guildhall-BM

Excluding any other synergies, Guildhall-BM feels just a bit worse than Smithy-BM. (This is based off of trying it against the bot and checking when I hit 4 Provinces, so it wasn't the most scientific study.) Obviously you never actually play Guildhall-BM, this is simply to show how useful Coffers are for a money strategy. It's already been noted that Spices + money is about as strong as Gear + money, and Spices is basically a Silver that lets you change $2 into 2 Coffers when you buy it. Coffers are especially useful in money strategies because they smooth out price gaps between things you care about. $3 for Silver, $6 for Gold, $8 for Province, often anything in between is useless.

In some limited testing I tried, without any other treasure synergies, buying Guildhall over the first Gold consistently saved at least 1 turn to hit 4 Provinces, sometimes 2 turns if the shuffles work out nicer. This is the base power of Guildhall, but there are things that make it better.

Incidental +Buy

Q: If I've built Guildhall and can't afford Silver, should I buy Copper?
A: Usually, yes. In a money deck the Coffers is usually worth having the extra Copper in your deck, especially because you get the Coffers right away. This is less true in Colony games but the cutoff point for when a free Copper is good is surprisingly early.

Because of this, having a bit of +Buy can help speedup time-to-first-Province, and if there are easy ways to get extra +Buy at little cost (like Pouch or Market Square), you should see it as speeding up the money baseline as well. Normally +Buy is only good for the engine because they can use the +Buy more effectively, Guildhall changes this a big.

Light Treasure gaining

This is along the lines of cards that gain 1-2 extra Treasures per play. Stuff like Jack, Haggler, or Lucky Coin.

They're good. I don't have anything to say besides that they're good and you should be aiming to take free Treasures if you're in a position to do so, because in a Guildhall-powered money deck, you'd take free Coppers if you could. With a Guildhall, Cache is actively better than Gold.

Heavy Treasure gaining (the Guildhall combos)

Here are the cards that give you lots of treasures. These cross the line from "money deck" to "Guildhall combo deck". Important ones are:
  • Guildhall + Beggar: When Beggars effectively give +$6, you can empty Provinces very quickly. Buy all the Beggars you can early, then buy Provinces whenever you can.
  • Guildhall + Masterpiece: Getting back everything when you overpay makes it easy to accumulate a massive store of Coppers that guarantees hitting $8 every turn afterwards.
  • Guildhall + Delve: Although the price-per-Silver is higher than with Masterpiece, this is still a very powerful synergy.
  • Guildhall + Trader: This is not as powerful as the other cards (seems to be about 11-13 turns to hit 4 Provinces), but it's another Treasure flooder that's worth mentioning. Trader trashing Silver is net +$1 that turn and gives you 3 Silvers. Trader trashing Gold is net +$3 and gives 6 Silvers. In my testing I aimed for 3 Traders, bought 1 Gold, then went for Provinces.

Guildhall Tactics

Q: Should I be using all my Coffers to hit the most expensive price points?
A: No. One thing about Guildhall is that it's only feeding you Coffers if you're buying Treasures. Once you start greening, the Coffers flow will slow down, so you generally want to bankroll some Coffers (about 2-3) for redundancy before you start greening. In other words, if you haven't bought Gold yet, don't spend your Coffers to buy Province. Generally your aim is to switch to buying Provinces at the point where you expect to hit $8 every turn, and if everything goes perfectly your Coffers stockpile should slowly dwindle to 0 while you do so.

This could be optimized much more but here's the guide I've been following.
* Spending 1 Coffers for a better card is always okay.
* Spending 2 Coffers is okay if you're buying a Gold, or other action improving your deck, but should be done with care. If I have $6 and 2 Coffers I will often buy the Gold to keep the Coffers for an upcoming Province rush.
* Spending 3+ Coffers should only be done when you're in greening mode.

Q: How should I handle buying non-Province VP cards?
A: If you are unmirrored, don't buy Duchies. Just, don't do it. Unmirrored means you're in a race against an engine, which means you just want to empty Provinces. If you need the VP from Duchies, you made a bad call early and Guildhall money wasn't fast enough, but you should commit to your win condition of emptying the Provinces rather than trying to not-lose. This is how you should normally play money vs engine, but it's extra-true for Guildhall, because treasure buys give you Coffers that let you stockpile Coffers across several turns to hit $8. This Coffers accumulation gives Guildhall-money a lot of inevitability.

Q: How should I handle Duchies if I'm mirrored?
A: Oh, I have no idea. It's shuffle-dependent and a big mess and there's a whole bunch of risk-reward involved. If the Duchy doesn't cost Coffers, I think you normally take it. If it costs 1 or more Coffers, it's a lot less clear.

12
https://web.archive.org/web/20140331192245/https://www.playdominion.com/Dominion/gameClient.html

It even auto-plays the title screen music! None of the buttons work anymore, but you can click them if you want.

Although the site isn't functional, if you look in the source code you can find a bunch of Javascript libraries. https://web.archive.org/web/20140630201304js_/https://www.playdominion.com/FSSDK/FSSDK.js is one of them, where FSSDK.js is likely short for Funsockets SDK, and https://web.archive.org/web/20140630144038js_/https://www.playdominion.com/Dominion/lib/DominionUI.js is the Javascript for the game UI. The code is surprisingly readable - it's not fully minified so a lot of the variable names make sense.

13
Dominion Articles / Draw-to-X engines
« on: October 10, 2018, 04:44:23 am »
I started this a while ago, then ran out of steam when I realized it was a lot harder to write than expected. This draft is very rough but I'm putting it up now just to be done with it.

Draw-to-X engines are a special subcategory of engine, formed by two pieces.

  • An action that says "Draw until you have X cards in hand".
  • Disappearing money - a way to get money during your Action phase that decrases your hand size. This doesn't have to be fancy, a terminal Silver will do.

When they work, draw-to-X engines are one of my favorite engines to play. The core idea with these decks is that the fewer cards you have in hand, the more cards the draw-to-X action gives you, so if you can consistently turn cards-in-hand into money, you get to draw a lot more cards than you normally would. For $5, the going rate is +3 Cards and a bonus, with +4 Cards costing $6. Meanwhile, Library can draw up to 7 cards if the conditions line up.

The big question is whether the conditions line up. Draw-to-X engines differ quite a bit from more traditional Village-Smithy engines.

1. Treasures and Victories Super Super Suck For You

A Village-Smithy engine can get away with only using Gold for payload. This does not fly for draw-to-X engines. Like, it completely fails.

Let's suppose you play a Library and draw a Gold. If you don't have a way to get the Gold out of your hand, it effectively says "every future Library you play this turn draws 1 less card". This is really, really bad! It adds up to 3-4 missed card draws, depending on how many Libraries you have. (Cards like Scholar don't have this problem, since they discard your entire hand.) This has greening consequence as well. Eventually, you need points. Each Province hurts your deck a lot more than it would hurt a normal engine.

It's really hard to start a draw-to-X engine if there isn't trashing, just because of how many stop cards you start with. Trashing on its own is sometimes but not always enough for the draw-to-X engine. Eventually, you need to pick up points, usually through Provinces. You can't trash Provinces without losing the VP...

This leads to the other important piece: a discarder, like Warehouse, Artificer, or Storeroom, that lets you get unwanted Treasures and Victory cards out of your hand. That way you can dig for Actions instead. An effect like Villa or Black Market (to play Treasures midturn) can also play the role of a card discarder.

If either trashing or card discarding were missing, I would need an exceptional circumstance to consider the draw-to-X engine. The classic Base set combo is Festival/Library, but in my experience with Base-only games, the combo is really more like Festival/Library with Cellar and some kind of trasher.

2. +Buy is Great

Engines like +Buy since it lets them buy lots of engine pieces in one turn, then green later. The "green later" part is what makes them extra nice for draw-to-X engines. In draw-to-X games it's usually correct to build longer, then end the game fast, since your engine isn't designed to handle greening over several turns.

3. Your Deck Can Be Less Consistent

Often, Draw-to-X engines use a disappearing village to get +Actions, because it turns the drawback (not getting to draw a card) into a benefit (will draw the card for free off the draw-to-X card anyway). Buying Fishing Village instead of Village gives you an extra +$1 over the next 2 turns while not hurting your draw - it improves your payload.

Except, it kind of does. If you're playing a Village-Smithy engine and your starting hand is

4 Villages, 1 Copper

you're a little unhappy, but not that unhappy. You get 4 chances to draw into the Smithy.

By contrast, in a Festival-Library deck, if your starting hand is

4 Festival, 1 Copper

you're *really* upset. You're unable to "go-off" with a Library this turn, and your later Libraries are all likely to be dead because your Festivals collided. I've had this happen a few time and it sucks every time.

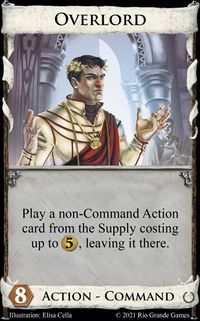
Because of this, it helps to have reliability increasing effects, like Scheme, Travelling Fair, Tracker, or Overlord. If a disappearing village and regular village are in the Kingdom, I personally like buying 1-2 copies of the regular village when my draw-to-X deck starts working, since I value the reliability more than the payload.

4. Hand Size Tactics are Sweet

The point of draw-to-X engines is to play lots of disappearing money, but there are other ways to get value while decreasing hand size. Trashers are one of them.

Consider this turn.
  • Play Festival, Festival, Library.
  • The Library draws a Steward and a Library.
  • Steward, trashing 2 cards.
  • Play Library
By trashing with Steward before playing the draw-to-X card, you get to draw 2 extra cards, which is a pretty great deal. You can't really plan for this, but it's an important tactical play. Ambassador 2 Coppers (handsize -3), then play Library. Remodel Silver into Festival (handsize -2), then play Library.

From a strategy perspective, plays like this don't tend to change what you buy - odds are you're buying trashing anyways. They're just important parts of optimizing draw-to-X builds.

5. Key Draw-to-X cards

An incomplete list of cards that are especially nice in draw-to-X games: Villa, Count, Storeroom, Steward, Inn, Warehouse, Cellar, Fishing Village, Squire, Junk Dealer. As an exercise it might be worth thinking through why some of these cards are so nice.

14
Help! / Is it possible to do better than tie here
« on: September 21, 2018, 02:14:49 am »
Game ID: 18509989

On my final turn I decided to go for the tie, I felt my deck was worse and there was a good chance my opponent would Province next turn. I got there by Butchering Artisan --> Province and buying Estate, hoping that would be enough to trigger my Silk Road. It wasn't.

I've been trying to see if I can do better, and there's a surprising number of tricks you can do here, despite the inability to draw. I've managed to get a tie on VP in 3 different ways. Is there a way to end the game on my turn with a win?

At the start of my turn, I have 5 Victory cards and 1 Silk Road.

15
Dominion Articles / Turn 1 Plan's effect on Turns 3 and 4
« on: September 14, 2018, 01:25:10 am »
On a recent trip, I had a few hours free with my computer and no Internet. Out of curiosity, I wrote a script to simulate a few thousand opening turns given openings where you open Plan/X vs Silver/X.

I'm assuming a bunch of things here:
  • You buy Plan turn 1, placing its Trashing token on an Action you buy turn 2.
  • There are no Heirlooms.
  • You don't get attacked.
  • There are no Shelters (didn't want to simulate Overgrown Estate.
  • On turns 3 and 4, you buy nothing. Depending on your opening, you may reshuffle before turn 4, and I didn't want to assume anything about what you buy on turn 3.

Obvious caveat: You don't buy Plan only because of what it does in the next two turns, you buy it because of the long term trashing you get to do. Given all these assumptions, idk how useful this data actually is, but it's sure a bunch of data!

Let me know if you see something interesting. Two things I noticed:

  • Plan + Terminal Silver guarantees you hit $5 in the next two turns
  • Plan + Poacher (or Tournament) is even more absurd of an opening than it sounds. Either you hit $5, or you hit $4 twice because you draw an Estate on turns 3 and 4. But in the 4/4 case, you just buy 2 Poachers to trash your last 2 Estates.

Silver + Terminal Silver
Money on turns 3/4Probability
2/50.27%
2/62.53%
2/72.49%
3/41.26%
3/511.09%
3/612.66%
3/75.03%
4/47.59%
4/525.68%
4/615.23%
4/71.23%
5/511.73%
5/63.20%

Hit exactly 0 $5+ hands: 8.85%
Hit exactly 1 $5+ hand: 76.22%
Hit exactly 2 $5+ hands: 14.93%

Hit exactly 0 $4+ hands: 0.00%
Hit exactly 1 $4+ hand: 35.34%
Hit exactly 2 $4+ hands: 64.66%


Plan + Terminal Silver
Money on turns 3/4Probability
3/628.03%
4/571.97%

Hit exactly 0 $5+ hands: 0.00%
Hit exactly 1 $5+ hand: 100.00%
Hit exactly 2 $5+ hands: 0.00%

Hit exactly 0 $4+ hands: 0.00%
Hit exactly 1 $4+ hand: 28.03%
Hit exactly 2 $4+ hands: 71.97%


Silver + Terminal Copper
Money on turns 3/4Probability
2/52.05%
2/65.07%
3/410.17%
3/524.07%
3/610.15%
4/417.66%
4/526.29%
4/62.57%
5/51.97%

Hit exactly 0 $5+ hands: 27.83%
Hit exactly 1 $5+ hand: 70.20%
Hit exactly 2 $5+ hands: 1.97%

Hit exactly 0 $4+ hands: 0.00%
Hit exactly 1 $4+ hand: 51.51%
Hit exactly 2 $4+ hands: 48.49%


Plan + Terminal Copper
Money on turns 3/4Probability
3/544.61%
4/455.39%

Hit exactly 0 $5+ hands: 55.39%
Hit exactly 1 $5+ hand: 44.61%
Hit exactly 2 $5+ hands: 0.00%

Hit exactly 0 $4+ hands: 0.00%
Hit exactly 1 $4+ hand: 44.61%
Hit exactly 2 $4+ hands: 55.39%


Silver + Terminal Giving $0
Money on turns 3/4Probability
1/50.52%
1/61.25%
2/44.99%
2/511.31%
2/65.00%
3/35.15%
3/425.12%
3/522.37%
3/62.60%
4/415.15%
4/56.55%

Hit exactly 0 $5+ hands: 50.41%
Hit exactly 1 $5+ hand: 49.59%
Hit exactly 2 $5+ hands: 0.00%

Hit exactly 0 $4+ hands: 5.15%
Hit exactly 1 $4+ hand: 73.16%
Hit exactly 2 $4+ hands: 21.70%


Plan + Terminal Giving $0
Money on turns 3/4Probability
2/516.77%
3/483.23%

Hit exactly 0 $5+ hands: 83.23%
Hit exactly 1 $5+ hand: 16.77%
Hit exactly 2 $5+ hands: 0.00%

Hit exactly 0 $4+ hands: 0.00%
Hit exactly 1 $4+ hand: 100.00%
Hit exactly 2 $4+ hands: 0.00%


Silver + Poacher
Money on turns 3/4Probability
2/50.24%
2/61.96%
2/73.16%
3/41.28%
3/59.42%
3/618.17%
3/73.15%
4/46.78%
4/536.26%
4/611.52%
5/58.07%

Hit exactly 0 $5+ hands: 8.06%
Hit exactly 1 $5+ hand: 83.87%
Hit exactly 2 $5+ hands: 8.07%

Hit exactly 0 $4+ hands: 0.00%
Hit exactly 1 $4+ hand: 37.38%
Hit exactly 2 $4+ hands: 62.62%


Plan + Poacher
Money on turns 3/4Probability
3/510.14%
3/615.30%
4/410.19%
4/557.89%
4/62.75%
5/53.72%

Hit exactly 0 $5+ hands: 10.19%
Hit exactly 1 $5+ hand: 86.09%
Hit exactly 2 $5+ hands: 3.72%

Hit exactly 0 $4+ hands: 0.00%
Hit exactly 1 $4+ hand: 25.45%
Hit exactly 2 $4+ hands: 74.56%


Silver + Smithy
Money on turns 3/4Probability
2/50.26%
2/61.29%
2/72.14%
2/81.39%
3/41.28%
3/55.58%
3/69.04%
3/710.88%
3/80.25%
4/43.82%
4/514.76%
4/623.38%
4/72.73%
4/80.14%
5/514.52%
5/66.24%
5/70.88%
5/80.09%
6/60.76%
6/70.57%

Hit exactly 0 $5+ hands: 5.10%
Hit exactly 1 $5+ hand: 71.83%
Hit exactly 2 $5+ hands: 23.07%

Hit exactly 0 $4+ hands: 0.00%
Hit exactly 1 $4+ hand: 32.11%
Hit exactly 2 $4+ hands: 67.89%


Plan + Smithy
Money on turns 3/4Probability
3/56.72%
3/613.53%
3/72.19%
4/526.99%
4/618.09%
5/518.91%
5/610.42%
5/71.05%
6/62.10%

Hit exactly 0 $5+ hands: 0.00%
Hit exactly 1 $5+ hand: 67.52%
Hit exactly 2 $5+ hands: 32.48%

Hit exactly 0 $4+ hands: 0.00%
Hit exactly 1 $4+ hand: 22.44%
Hit exactly 2 $4+ hands: 77.56%


Silver + Terminal Giving +2 Cards
Money on turns 3/4Probability
2/50.24%
2/61.24%
2/73.85%
3/41.25%
3/55.60%
3/627.79%
4/43.81%
4/556.23%

Hit exactly 0 $5+ hands: 5.06%
Hit exactly 1 $5+ hand: 94.94%
Hit exactly 2 $5+ hands: 0.00%

Hit exactly 0 $4+ hands: 0.00%
Hit exactly 1 $4+ hand: 39.97%
Hit exactly 2 $4+ hands: 60.03%


Plan + Terminal Giving +2 Cards
Money on turns 3/4Probability
3/42.36%
3/514.18%
3/67.22%
4/420.30%
4/549.92%
4/62.40%
5/53.62%

Hit exactly 0 $5+ hands: 22.66%
Hit exactly 1 $5+ hand: 73.72%
Hit exactly 2 $5+ hands: 3.62%

Hit exactly 0 $4+ hands: 0.00%
Hit exactly 1 $4+ hand: 23.76%
Hit exactly 2 $4+ hands: 76.24%

Code is at https://pastebin.com/YCexJ5A2

16
Dominion Articles / Making the Most of Your Turns
« on: July 03, 2018, 02:02:39 am »
This is basically a rewrite of an old article I wrote.

If you have an example of one of these, I'd appreciate a picture / replay.

Competitive Dominion is first and foremost a game of optimization. It's not enough to do something cool - you have to do it quickly. Accordingly, a lot of the strategy is about figuring out what's cool and whether you can do it fast enough to make it worth it.

I like to think of Dominion gameplay as two broad categories: strategy, and tactics. Strategy is your plan for the entire game - tactics is your plan for this turn. In this article I'm going to focus on just one aspect of the tactics: how to play your hand. This is the nitty-gritty of Dominion optimization - you can usually autopilot your hands, but sometimes you get a slight edge if you don't, and those edges can add up over the course of a game. More importantly, the correct play is a lot less ambiguous - this makes it easier to give advice that actually doesn't depend on the board (which is a rare situation in Dominion.)


There are two principles to keep in mind.

1. Keep your options open as long as possible.
2. Watch your reshuffle timings.

Let's begin.

Gainers

If you have a card that gains other cards to your discard pile, and you want to draw those cards, then playing the gainer before you reshuffle lets you get that card into your draw pile sooner. Conversely, if you don't want to draw the gained card, playing the gainer after the reshuffle guarantees you can't draw it for 1 cycle through your deck.

In either case, you should play the gainer as late as possible - if you can, gain cards right before the shuffle, or at the end of your turn. This gives you more information - depending on what you draw, you may decide to gain a different card than you intended.


Trashers

For cards that trash from your hand, play them later rather than earlier. It doesn't matter when you trash your cards, because you've already drawn them. The only thing that matters is that they get trashed before you finish your turn.

This is most important for Junk Dealer - because Junk Dealer is a cantrip, it can be tempting to play it early to draw another card, but unless you need that card now, you should play your other draw cards first, to see if you can find a better trash target.


Saving Your Throne Rooms

Some cards are better to copy than other cards. You always want to double the Action that gives you what you're lacking the most. If you need draw, then Throne Room Hunting Grounds. If you can comfortably draw your deck, save it for a card that gives +$ or +Buy. If you need Actions, then try to save your Throne Room for another Throne Room if you can, and then double a card that gives +Actions if you can't.

In any of these cases, it is better to hold onto Throne Room until you know what you need this turn. Maybe you need the +Cards because you drew poorly. Or maybe you don't, in which case you'd rather have the +$.

If you draw a hand of Throne Room and 4 other Actions, then playing Throne Room first is probably wrong. You want to play your other Actions first, to see if you can draw a better target for Throne Room, and then play Throne Room only when you're at-risk of running out of good Throne Room targets. (Either because you are running low on Actions, or because you are drawing too many Throne Rooms and not enough non-Throne Room actions.)

This logic is especially important for King's Court - the best target for King's Court is almost always another King's Court, so you want to save your KC until as late as possible.

A smaller note is that if you have plenty of Actions, you actually don't need to Throne Room your Throne Room. TR-TR-Action1-Action2 takes 1 action. TR-Action1 then TR-Action2 takes 2 actions. In both cases, you play Action1 twice and Action2 twice. The latter case costs 1 more action but gives you more flexibility. (For example, TR-Action1 to get close to the end of a reshuffle, play Butcher to gain a card, TR-Action2 to trigger reshuffle.)


Cards relying on cards in your deck

These are cards like Ironmonger, Chariot Race, and Golem, where they reveal cards from your deck and do something based on what you reveal. In games where you can draw your deck, you want to play your card-revealers first, while you still have cards in your deck to reveal. It's always sad when someone saves their Golem and then it only reveals 1 Action instead of 2.


Wishing Well ordering

Dan already mentioned this in another article. Say you have N cantrips, 1 Wishing Well, and the only thing you care about is drawing a specific card (say a Remodel to Remodel for the final Provinces.) You should play the Wishing Well last.

  • If the Remodel is in the top N+1 cards, you draw it no matter when you play Wishing Well.
  • If the Remodel is the N+2nd card, then you only draw it if you play Wishing Well last and wish for Remodel.

The same is true if your hand is generally draw cards, instead of just cantrips.


Card-Revealers and Shuffle Timings

Speaking of Wishing Well, note that because it draws a card and reveals a card, it triggers a reshuffle if you have fewer than 2 cards in your deck, even though it only draws 1. If you don't want to shuffle, your hand is Peddler + Wishing Well, and there are exactly 2 cards left in your draw pile, then you need to play WW first (wishing for a card you don't have), and then Peddler.

Similar principles hold for Sentry (reshuffles with < 3 cards), Cartographer (reshuffles with < 5 cards), Patrol (reshuffles with < 7 cards), and others.


Unintuitive Discards

If you get hit with a discard attack like Militia, you have to choose the best 3-card hand. Note this may be different from the 3 best cards in your hand.

Here's the game state: It's early in the game. I have 2 cards left in my draw pile. My hand is Warehouse, 2 Coppers, 2 Estates. My opponent plays Militia.

The play here is to discard 2 Coppers. Why? Well, I'm not going to buy anything that costs $2. If I discard 2 Coppers, I can play Warehouse to trigger the reshuffle, making both Estates miss the shuffle. Sure, the Warehouse misses the shuffle too, but that's worth it. This was a rare scenario where the best hand was actually one that had Estates in it.


Throne Roomed-Minions

An old classic. If you Throne Room a Minion and plan to discard your hand, you should discard your hand first. That way, you have the choice of +$2 (if your new hand is good) or a 2nd discard (if your new hand is terrible).


It's usually impossible to attribute a win entirely to these choices, since each choice only gives you a small edge. On the other hand, there's no reason to not do these things, so you should just do them. It takes a bit of practice to keep it all in mind, but soon it becomes second-nature, and then you can focus on the important strategy questions instead.

17
Other Games / Dicey Dungeons
« on: June 14, 2018, 02:19:40 am »
https://www.terrycavanaghgames.com/dice/

One of the latest games Terry Cavanagh is working on. He's most well known for VVVVVV and Super Hexagon. It's a dice-based roguelike, and it's free to play in the browser. New builds have been coming out every 2 weeks. Interface is pure drag-and-drop, there's no save file and you'll lose progress on a refresh.

It's somewhat unpolished, but it was still strangely fun. I beat Warrior and Inventor on my first try. Thief took me a few tries, I beat it when I got the Thieves Guild and learned Backstab which helped my damage output a lot. I still haven't beaten Witch, I feel like I'm always too low on health, and die on floor 4 to a high damage enemy or a Banshee that keeps silencing me.

Edit: just beat Witch, essentially by lucking into a floor 4 where I only had to beat one enemy to pass, and where I set up a good spellbook before I got silenced every turn.

18
Dominion Articles / Castles
« on: March 28, 2018, 02:40:07 am »


Despite having lots of different effects, Castles aren't that complicated. Just think of them as having a 2nd pile of Provinces in the game. If it's the kind of game where that's appealing to you, then imagine when you'd start greening in a game with 2 Province piles, and start buying Castles about 1 shuffle or 1-3 turns before that.

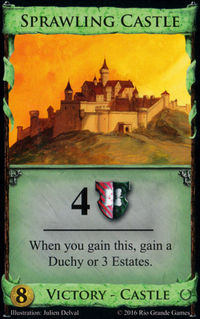
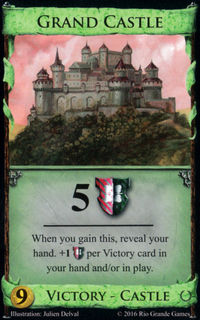
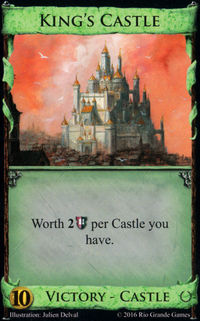
If you do the math, buying 8 Castles gives you 45 VP, plus whatever VP you gained from buying Grand Castle. 8 Provinces gives 48 VP. In principle, this shows that buying only Castles is competitive with buying only Provinces. In practice, no one will ever let you buy all the Castles uncontested. At minimum, expect competition on the $8+ Castles. Sprawling and Grand are almost always worth more VP than a Province, and players will buy King just to deny VP from the player who has more Castles.

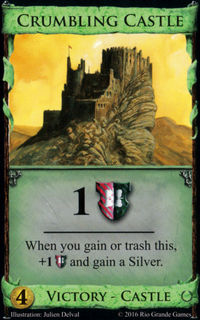
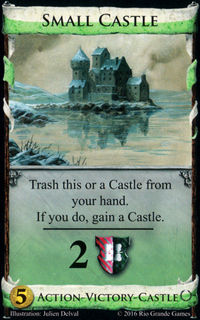
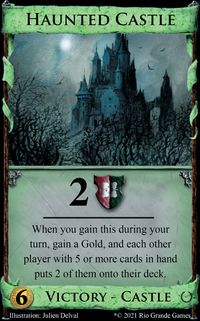
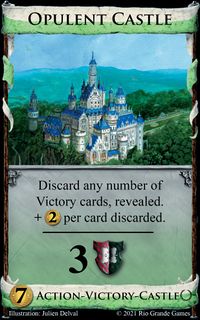
Having more VP in the kingdom leads to all the follow-on effects you'd expect. More VP makes the game go longer, and longer games favors building your deck more. Many of the Castles help with this - all the Castles between $4 and $7 give you more than just VP. The two Action castles, Small Castle and Opulent Castle, are particularly important. Small Castle can quickly upgrade itself into a better Castle, whereas Opulent is important because it can produce a lot of money when players start greening. This makes buying either Crumbling Castle or Haunted Castle a bit of a risk, because it gives your opponent the first chance at buying Small Castle and Opulent Castle respectively. Of course, how big a risk this depends on how long you think the game is going to go. The sooner the game end, the less the Action castles matter. Buying Haunted Castle also makes it less likely your opponent hits $7. I often find that the risk of revealing Opulent Castle is worth the 2 VP + Gold + topdeck attack that Haunted Castle gives.

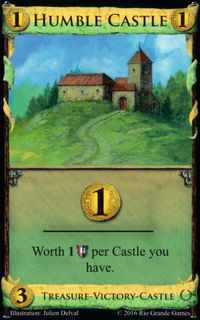
As for Humble Castle, it's a little weird. It gives VP for every Castle, and there's only 1 Humble Castle, which can make it look like it's worth fighting over. However, it's still a genuinely bad card to buy. At the end of the game, Humble Castle is usually worth 3 VP to 5 VP, and although that's above-average rate for $3, buying it early on is a huge opportunity cost. There are two cases where it's worth buying Humble Castle early. One is Shelters games, to turn your starting Hovel into a Copper. The other is Keep. In a Keep game, Humble Castle is always worth at least 6 VP. Even in this scenario, I don't like opening Humble Castle. 6 VP for $3 is very cheap, but opening buys are very, very important. On most boards I'd gladly give my opponent 6 VP if they were forced to open Copper.

Besides these considerations, Castles are mostly a tactical decision, not a strategical one. They aren't like Gardens, or Duke, or Fairgrounds, where you have to plan a bit to get VP out of them. Castles are just there, and whether the VP is worth it or not depends on where you think your deck and the game are at.

19
Dominion General Discussion / If you could only have 1 opening
« on: February 14, 2018, 03:47:06 am »
Context: there was a recent Reddit thread about the balance of the opening hands, and some discussion on the subject in the markusin vs Stef World Cup match, where Stef had to open Amb/-- on a 5/2 split.

If you had to pick between only 5/2 or only 4/3 for all future games, which would you rather have?

To address pedantic points:
* The order is still random, i.e if you pick 5/2 it's still random whether you get $5 on turn 1 or turn 2.
* If Heirlooms are in the game, they replace a random Copper.

20
Dominion Articles / Witch, revised for 2018
« on: February 10, 2018, 03:47:41 am »
It's still good.

You should still buy it.

If you don't, you should still have a good reason, and I mean a REALLY good reason.

"But there's trashing!" - No, every Curse they trash is a Copper or Estate they didn't get to trash.

"But the trasher competes at the $5 price point!" - You may want to buy the trasher first, but if you do, you should probably still buy the Witch later.

"But Mountebank is in the kingdom!" - Actually, after you play Mountebanks a few times, they block it often enough that you probably want to buy the Witch to hand out the rest of the Curses.

"But Moat is in the kingdom!" - Having a Witch still threatens handing out Curses. They only have to fail to have Moat once to get punished for it. And if they buy a lot of Moats, then you've hurt them in a different way: they spent a bunch of Buys on Moats.

"But Lighthouse is in the kingdom!" - Okay. The Moat principle still applies - they only have to miss it once to get hurt. However, it's a lot more okay to have lots of Lighthouses, and in some games it's even beneficial (i.e. Minion games). So sometimes, they do have enough Lighthouses to make buying Witch redundant. But if you notice they've gotten complacent and are starting to miss Lighthouse turns, maybe you should reconsider that Witch...

"But Ambassador or Masquerade is in the kingdom!" - These do counter Witch the most regularly. It sucks when they give you back a Curse.

"But I'm drawing my deck, and I have a trasher, and I'm out of things I want to trash with it! I'll just trash the Curse if I get Witched!" - Sure, this is true for now. It's easy for this to stop being true, as you add payload or VP to your deck. Much like the Moat argument, if they're playing Witch every turn, you only have to fail to draw your trasher once to fall behind on having a thin deck. Once you fall behind the first time, it's more likely you fall behind the next, and soon your thin deck has 3 Curses in it. It's a classic recipe for beating people who are overconfident in their deck's reliability.

A lot of new players don't like Witch, because it slows down the game. Most people's idea of fun is getting to play a bunch of cards and produce a bunch of money. Witch gets in the way of that. But I like Witch. When I give out Curses, I think to myself "yes". When I get Curses, I think to myself "no". Even if you don't like it, you have to respect it.

Sometimes, you can skip Witch, and you get to be a Hero. Maybe even a Champion. Just be careful out there. Curses make the world a scary place.

21
Dominion Articles / Trash-for-Benefit and Stored Value
« on: January 27, 2018, 08:55:24 pm »
Stream of consciousness article, may clean up later.

I should start by defining trash-for-benefit.

A trash-for-benefit card is a card that trashes other cards, then gives you a benefit based on the cost of the trashed card or cards.

This excludes cards like Spice Merchant, Forager, and Trade Route. All of these cards trash cards, and they all give some benefit, but the benefit isn't tied to the cost of the card.

Why do I bother making this distinction? All trash-for-benefits that care about cost hit upon the same concept: the idea of stored value. I believe MicQ was the first to coin this term. It's a pretty simple principle: whenever you buy a card, you "store" the money spent that turn into the card you bought. You can later "cash-in" that value with a trash-for-benefit card.

Once you start thinking in terms of cost, you can derive several synergies.

Trash-for-benefit + on-gain cards: The cost of some cards is tied to their on-buy or on-gain effects. Border Village and Farmland are classic examples, and Skulk is a more recent example. Once you've gained the card, you've already gotten a lot of the value, so feeding those cards to a trash-for-benefit lets you cash-in more value than a typical card of that cost.

Trash-for-benefit + cards that get worse over time: Spice Merchant is a good opener, but gets worse as you run low on Coppers to trash. Witch is a good card, but once the Curses are gone, it's just a Moat. A trash-for-benefit card can let you get rid of the Spice Merchant or Witch after it's done most of what you wanted it to do.

One of my favorite synergies is Butcher + Spice Merchant. Normally, you don't buy that many Spice Merchants because they quickly run out of treasures to trash. Butcher lets you buy more Spice Merchants because you know you'll be able to cash in your extra Spice Merchants once your deck is thin.

Trash-for-benefit + cards that gain other cards: Magpie lets you gain a ton of Magpies, but from a trash-for-benefit perspective, it's more important that it gains you a bunch of $4 costs. Rats is similar - it converts junk cards in your deck into junk that costs $4. That isn't great, unless you have something that cares about the cost of cards, like a trash-for-benefit...and then suddenly it's ridiculous. Port gives you two $4 costs per buy.

Often, treasure gainers let you gain high-cost cards for less than their true cost. Think how Bandit (a $5 cost) gains you Gold (a $6 cost) every time you play. Treasure gainers can do this because treasures are usually worse than Actions, but this opens up neat lines of play if you can feed the treasure-gain to a trash-for-benefit.

A final note: it's usually not worth going too far out of your way for these trash-for-benefit synergies. One of the big newbie mistakes is to believe that you should always spend all your money each turn. This is still a mistake, even when trash-for-benefits are in play. The one exception is when you have a very consistent engine, and it's very important to have a card of a specific cost. The last example I can think of is an old game where Procession, Adventurer, and King's Court were in the Kingdom. On that board, I definitely Processed Adventurer a few times to gain King's Court. But that was very much the exception, and not the norm. More commonly, you add these trash-for-benefit synergies to an existing strategy, and let those synergies nudge you in the direction of buying extra Spice Merchants, or knowing you can buy something other than Gold because you're going to Remodel Witch into Gold. Not enough to sustain a deck by itself, but certainly enough to make an existing deck better.

22
Dominion Articles / Overdrawing
« on: January 02, 2018, 04:11:51 am »
In this article, I use "actions" to denote the resource that lets you play Action cards, and "Actions" to denote the actual cards.

What is overdrawing?

Your deck is overdrawing if the number of cards you can draw each turn is greater than the number of cards in your deck. As an extreme example, consider a deck of 5 Laboratories, nothing else. Your starting hand will be 5 Labs, and none of them will draw any cards, because there are no cards left in your draw or discard. A less extreme example is a deck with 5 Labs, 3 Coppers, 1 Silver. This deck is guaranteed to play all 5 Labs. The first 2 Labs will draw cards, and the remaining 3 Labs won't draw cards. Both of these decks are overdrawing.

You can calculate overdraw carefully if you want to, but usually you can figure it out on the fly. On a given turn, if you've drawn your deck and have extra drawing Actions left over, you're overdrawing. If you've drawn almost all of your deck and you're out of drawing Actions, you're on the cusp of overdrawing, and can get there if you buy more drawing Actions.

Overdrawing is only possible on boards where it's possible to draw your entire deck each turn, which limits the discussion to strong engine boards.

Is overdrawing good or bad?

Generally, overdrawing is a good thing, but major overdrawing is a bad thing. A deck that overdraws too much is inefficient, because too many buys have been spent on cards that could have been payload. However, a deck that overdraws a bit can do plenty of tricks that a non-overdrawing deck can't do. A big example is mid-turn gaining. An overdrawing deck can play a gainer (like Workshop), draw through the rest of the deck to trigger a reshuffle, then draw the gained card and play it the same turn it was gained. This can help if, say, you really need another $2 this turn. You can Workshop a Silver, then draw it with overdraw to get the $2 you need. I've done this several times in Base-only games.

With the right setup, you can do some explosive things. Here's an example from a game I played about two weeks ago. At the start of my turn, I had 2 Stonemasons, a Bandit, and tons of overdraw and actions thanks to several Lost Cities and Encampments.

  • Played Bandit, gaining a Gold.
  • Drew Gold with overdraw. Stonemason trashed Gold into Bandit and Plunder.
  • Drew Bandit and Plunder with overdraw. Played Bandit to gain Gold.
  • Drew Gold with overdraw. Stonemason trashed Gold into 2 Plunders.
  • Drew Plunders with overdraw.

So, to recap: in a single turn, I gained and played a Bandit and 3 Plunders, which gave me an extra $6 that turn (not to mention 3 VP). From here, I ran away with the game.

The core principle of overdraw tricks is simple: any time you could have drawn a card but didn't, you're wasting a draw. If there's a way to avoid wasting that draw, you can use it to get more out of your turns. Gainers are the easy way to do this, because it adds a new physical card to your deck. However, there are other ways to convert extra card draws into resources.

Consider Plaza. Plaza can convert a draw of a Treasure card into a coin token. If you draw your entire deck, you can repeatedly draw and discard a single Copper to multiple Plazas. letting you get several coin tokens. There's an elegance to this: Plaza both gives the overdraw and gives a way to convert your draws into something else. The same can be done with Baron, where you repeatedly draw and discard the same Estate to multiple Barons. However, you need other Actions to give you the overdraw required.

In a game with Storeroom and Scrying Pool, if you have extra Pools after drawing your deck, you can play Storeroom, discard all your Actions for coins, then play Scrying Pool to redraw all those Actions. Here, Scrying Pool is the source of overdraw, and it gets converted into coins with Storeroom.

Tournament is another big example. With overdraw, a single Province can be discarded to multiple Tournaments, to gain multiple prizes in one turn. It helps that the Prizes you gain can themselves help with triggering the reshuffle needed to get the Province back into your draw pile. I once played a game where it was clear Followers was the most important prize. My opponent got to Province first, and gained Trusty Steed first. I thought this was a mistake, right up to the point where he redrew Province and played a 2nd Tournament to gain Followers too. Gaining Steed first simply minimized the chance he would run out of actions to play the rest of his deck.

I've even had this happen with Castles. Opulent Castle lets you discard Victory cards for $2 each. Grand Castle gives you extra VP on-gain for each Victory card in your hand. So, in one game, I played Opulent Castle, got money out of my Victory cards, then redrew them with overdraw to get more points out of the Grand Castle I was planning to buy.

In these examples, we are not using our overdraw on newly gained cards to our deck. Instead, we are using our extra draws to draw existing cards multiple times, and using other card effects to make this useful. This principle is key to two of the most powerful combos in the game, Hermit + Market Square and Apprentice + Market Square. Heavy overdraw (from Madmen or Apprentice trashing Gold) lets you repeatedly redraw Market Squares, which can be repeatedly discarded to gain more Golds from the Market Square reaction.

I've focused on the flashy examples in this article, but that doesn't make the less flashy examples useless. Whenever you're in a position where you're about to waste card draw, take a moment, and see if you can gain a small edge by doing an overdrawing trick. Trust me: it adds up.

PS: a final exercise. Consider these comments from the reveal thread for the Dismantle promo.

One of the more useful things to do with [Dismantle] is probably "discard a Gold to gain a card costing up to $5".
Woodcutter can also gain $5s in combination with Gold, just not midturn.

Suppose Dismantle only worked with Gold, and it literally read "You may discard a Gold. If you do, gain a card costing up to $5." Is it clear that in some games, you'd still want this Dismantle over Woodcutter?

23
Dominion Articles / Band of Misfits and Overlord
« on: December 26, 2017, 05:03:14 am »

The ultimate "depends on the kingdom" cards. Also, the cards with some of the most annoying rule headaches.

For both Band of Misfits and Overlord, you're looking for Actions that are contextually powerful. What does that mean? Some Action cards are usually strong, and other Action cards are usually weak, but some cards are strong / weak depending on context. For example, Noble Brigand is strong if you know they have a Gold in their first 2 cards, and it's weak if no Silvers or Golds are on top of their deck.

Noble Brigand is an extreme example, because it goes between "+$1" and "+$1, opponent trashes a Gold, you gain a Gold", which is a huuuuge shift. However, the power of most Actions depends a bit on context. Consider a classical Village + Smithy deck. Village is contextually strong when your hand has a lot of Smithies and you only have 1 action. Smithy is contextually strong when you have plenty of actions. And, consider a +Buy card - strong when you have a lot of money, weak when you don't.

Band of Misfits and Overlord are especially powerful in games where you expect to run into several contexts where the best Action is different. This is because of an obvious observation: if you always play your Band of Misfits as the same Action, you could have just bought that Action. The only way you can get extra value is if you play your Band of Misfits as different Actions depending on the situation. For example, in a game from Dominion Championship 2017, I played Overlord as Rabble (when I needed draw), Village (when I needed the Actions), Explorer (when I had a Province in my hand), Chariot Race (when a previous Chariot Race revealed a low cost card on top), and Catapult (when I had good ammo for my Catapult). If I had wanted all of those effects, I could have bought an actual Explorer, or an actual Catapult, but it would have been much less consistent. I didn't want an Explorer or Catapult in my deck, because I don't always want to play an Explorer, or play a Catapult, and having the terminal when I don't want to play it is wasted space. But a card that could be an Explorer or a Catapult when I needed it, and a Village / Rabble when I didn't? Sign me up!

There are some trade-offs to this power. It costs more to buy BoM / Overlord, compared to buying the action directly. And, if the pile you want to copy is empty, you can't play BoM / Overlord as that action, which can strand your deck in some situations. In my experience, Band of Misfits is okay, but often has a lot of competition at the $5 cost spot. Overlord, on the other hand, is incredibly strong. Seriously, if you haven't tried it yet: just buy Overlord whenever you'd buy a $5 cost Action, or whenever you want to buy a $5 cost but don't have $5. 8 debt isn't that much more than $5, and the benefits are usually worth it.

Some final points: copying a Reserve card doesn't work, because once BoM / Overlord goes to the Tavern mat, it is no longer a copy of that Reserve card, so you can't call it anymore. Additionally, when Adventures tokens (+1 Card, +1 Action, +$1, +1 Buy) are on the board, BoM and Overlord get the bonus of both the tokens on their pile and the tokens on the Action they copy. If you have a lot of Overlords, consider placing your most important token directly on Overlords, instead of the Action you normally copy. Finally, for Conspirator, BoM / Overlord count as two separate Action plays, since you first play the BoM, then play the action it copies.

24
Rules Questions / A Peddler cost reduction edge case
« on: October 29, 2017, 05:14:30 am »
Peddler says "During your Buy phase, this costs 2 less per Action you have in play."

Say I play Possession, and the possessed player plays at least 4 actions. During the possessed player's Buy phase, I make them buy Cursed Village. I gain the Cursed Village instead, so I get the Hex. The Hex pile turns up Locusts and trashes a Peddler. Did my trashed Peddler cost $8 or $0?

25
Dominion General Discussion / Help me solve an idealized endgame
« on: October 14, 2017, 05:53:13 am »
I was thinking about endgame buy decisions, came up with a simple setup, and spent a few minutes trying to solve it. I didn't get a finished solution so I'm passing it on to you.

Alice and Bob are both playing an engine that's capable of drawing the entire deck every turn. Both of their decks start by producing $13 each turn. They both have a reasonable amount of buys: at most 4 buys a turn. (Enough to do most things you want, but not enough to empty the Estates in one turn.)

Neither has bought any VP yet. There are no ways to gain cards mid-turn. The only way to get more money is by buying Treasures. You're guaranteed to draw all Treasures you buy. To make this better model a real game, you are not allowed to buy Copper, you must buy Gold instead of 2 Silver, and you cannot buy Estate unless there are 6 or fewer Provinces in the supply.

Alice goes first. What is Alice's optimal strategy? She's guaranteed to either win or tie by a strategy-stealing argument, but I'm not sure what the right buy-path is.


Pages: [1] 2 3 ... 6

Page created in 0.097 seconds with 16 queries.